Wednesday, October 26, 2011

Asian Pear Roasted Vegetable Fettuccine with Asiago Cheese Sauce


I was recently introduced to the Asian Pear in Cranbury, NJ at Lee Orchard Garden where you can pick your own pears! This is the type of place that is not easy to find unless you know of someone who has been before. There is a little sign out in front of an ordinary looking house leading to the farm. The sign is easy to miss if you are not looking for it.  There is certainly nothing ordinary about this place. Bob Lee and his wife grow Asian pears, grapes, apples and some vegetables that I have never heard of nor can I remember the name! They work hard and keep the farm immaculate. A true labor of love! I was fortunate to meet them and their very cute dogs.

The Asian Pear tastes great as is, but can also be used in a variety of recipes. I started asking around for good recipes and a friend told me about this pasta dish she had in Northern California. I altered it slightly by substituting brussels sprouts for roasted parsnips and asparagus. I love brussels sprouts, but the market did not have any that looked good. The roasted parsnips and asparagus worked out well in the end. The pear was so fresh that it somehow made the asiago cheese sauce seem healthy! You could try adding roasted butternut squash, fish, chicken... this is a great dish. I think the Asian pear is now my favorite fruit!


Ingredients

1Asian Pear, thinly sliced
1bunch asparagus
2-3parsnips
snow peas
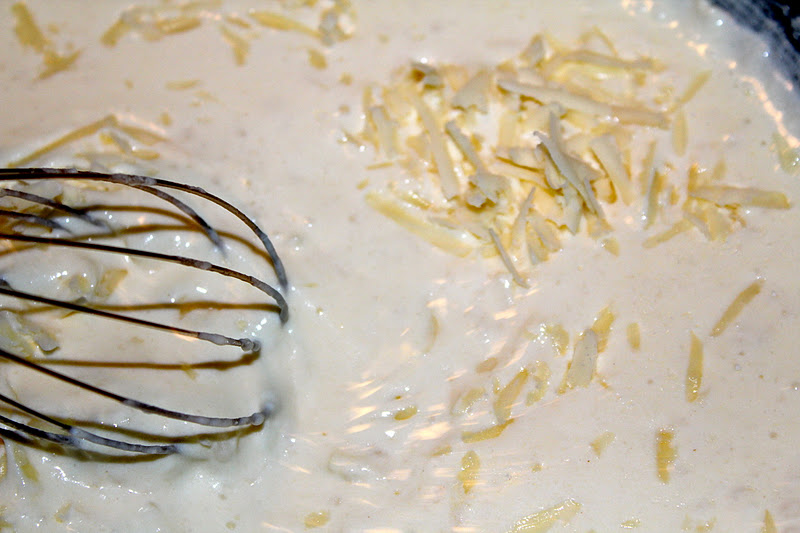
1 cup asiago cheese, shredded
1 cup light cream
3 tablespoons butter
pepper
fettuccine


Directions

Preheat oven to 350F. Cut asparagus and parsnips into bite sized pieces and add to baking dish with about 3 tablespoons olive oil. Roast (~30 min). Saute snow peas in 1 tablespoon of oil. Set aside. Heat cream on medium. Add butter. Once the butter is melted add in flour one tablespoon at a time. Next, slowly add in cheese. Sauce will thicken. Season with pepper. Cook fettuccine, drain and add to cheese sauce followed by roasted vegetables, snow peas and pear slices. Serve!


Enjoy!

Monday, October 24, 2011

Squash Candy

I took a giant leap outside of my candy making comfort zone and set out to make squash caramels with the candied spaghetti squash I had leftover from making the Candied Spaghetti Squash Custard Tart. I knew that caramels could be tricky. The process was fun. I ended up with a squash sugar candy with lots of flavor and a nice burnt sugar squash chocolate covered brittle, but no caramels. I found this Ginger Cinnamon Caramel recipe after the fact and realized that I did not add enough butter and cream into my mixture. Plus, I may have taken it off the heat a little early. I think this calls for a consultation with my friend and caramel expert, Kai over at Nosh This to know for sure... what a good excuse to plan for another trip out to San Francisco!
In the end, my squash candies were tasty. I was really impressed when one of my scientist friends could taste a hint of the ginger in the softer, lighter pieces. I still plan on making another attempt at conquering the caramel at a later date! 

Ingredients
 ~2Cups candied squash mixture 
(refer to "Candying The Squash" in Candied Spaghetti Squash Custard Tart)
Candy Thermometer
Blender 
Parchment Paper
Chocolate (I used Ghirardelli 60%)
1 Tablespoon butter
1/4 Cup heavy cream
Candy wrappers (optional)

Instructions
Butter a glass baking dish (I used 11x7). Heat the candied squash mixture in a medium saucepan on medium high until warm and easy to pour. Blend using a hand blender or if you are like me and do not have a hand blender, use a countertop blender and blend until smooth and squash pieces are no longer visible. Return to saucepan on medium high heat. Add butter and heavy cream. Bring the temperature to soft ball using candy thermometer. Remove from heat, pour into glass baking dish, smooth and cut into pieces. Now, this is where you should have nice, chewy caramels. For me, the candy was sugary and soft, but not chewy. It was more like a maple sugar candy. Curious to see what would happen, I decided to return some of the candy to the saucepan and heat a little more. The candy darkened and ended up as a burnt sugar brittle. I cut the brittle when it was cool enough (yet still soft) with a strong pair of kitchen sheers. This really helped to create nice little squares. I had some Ghirardelli chocolate close by (I always have chocolate close by), so I melted a bar and dipped the squares. I then put the chocolate dipped squares in the freezer until set and wrapped in candy wrappers to be extra fancy.


The candy almost started to look like caramel when it came in contact with the buttered dish. 


Enjoy!

Tuesday, October 18, 2011

Candied Spaghetti Squash Custard Tart


Spaghetti squash is a fun, versatile vegetable. It's a great healthy substitute for pasta and can be eaten with tomato sauce or I really enjoy eating it straight up with a little cinnamon, cardamom, and a little nutmeg. It's packed with folic acid, potassium, Vitamin A, and beta carotene with only 42 calories per cup! I decided to fatten it up a bit by candying the already sweet squash and using it to make a dessert tart. I really had no idea how the end result would turn out, but I was hoping for what I ended up with. The custard and candy sweet squash blended really well together. I made this with a friend and brought it to a party. I found it amusing that people who have never had spaghetti squash thought I had used spaghetti pasta and sweet cheese! So, I am pleased to introduce this phenomenal food to those who may have never tried it before.


Ingredients

1 Spaghetti squash
Nutmeg
Cinnamon
Cardamom
Canola oil

Baked Custard
(Betty Crocker original)
3 Eggs
1 cup evaporated milk
11/2 cups soy milk
1 teaspoon vanilla
dash of salt

Crust
Note: I modified my recipe and added 1 tablespoon of corn flour and 2 tablespoons of shortening after making this crust.

Directions
Preheat oven to 350F. Cut Squash in half, lengthwise. It helps to have a good knife and strong muscles to do this. I had a knife and my friend had the muscles! Brush with canola oil. Season with cinnamon, nutmeg and cardamom. Bake until you can easily separate spaghetti-like striations off the squash with fork (~30 min.).

Prepare dough for the pie crust while the squash is cooking. After chilling the dough, roll out and place in tart pan. Poke the dough with a fork and place in freezer for at least 15min. or until squash is done. Remove squash from oven and remove its fabulous spaghetti insides. Bake pie crust until you just start to see it turning golden brown. 


spaghetti!
It really is squash!
Candying The Squash
I am fairly inexperienced with candying. In fact, this was the first time I have ever done this! You may have a little better luck with achieving a more candy-like consistency. The squash was definitely sweeter with a pretty amber color. 

Add equal parts sugar and water in a medium saucepan. Add half of the spaghetti squash and bring to a boil. Next, add 1/2 teaspoon powdered ginger. This added a really nice flavor to the tart! I use Penzeys. We tried to achieve a soft ball candy, but when the temp reached 212F and sat there for a bit, we  turned off the heat. The spaghetti squash looked like glass noodles:


Add the non-candied spaghetti squash to the bottom of the pie crust followed by the custard mixture. 


Custard
Beat eggs, sugar, vanilla and salt in medium bowl. Heat milk (I used a combination of evaporated and soy milk since that is what I had on hand. It tasted great!) and beat with egg mixture. 


Once the custard mixture has been added, fork the candied squash randomly on top. Allow some of the sugary syrup to drop in.  The sugar will caramelize along the edges of the crust while baking, adding extra sweetness! Bake until knife inserted in the middle of the tart comes out clean.

candied squash pinwheels! 
 I decided to make some candied squash pinwheels with the left over dough.  I added some Chipotle Taza chocolate I had left from the Taza factory tour a few weeks ago. The combination was delicious! A nice sugary coating cooked on the bottom of the pinwheels and they were a nice treat to eat while waiting for the tart to cook! My apartment was smelling pretty heavenly!


Enjoy!

Friday, October 14, 2011

Apple Crisp


Apple picking season has quickly arrived. I really enjoy introducing people to this annual activity. A favorite local spot is Honey Pot Orchards in Stowe, MA. People will wait in line for up to one hour to eat the freshly made apple cider doughnuts! I remember one year when I brought a friend who had never been. After 30 minutes of waiting in line he grew increasingly impatient. We almost knew everyone around us as you have no choice but to share in each other's pain waiting in line while smelling the waft of delicious doughnuts being made. It can be agonizing. My friend waited it out and after one bite of a warm cider doughnut, the look of satisfaction was priceless.  This year I went with a few friends who are apple picking veterans. Cooking immediately afterwards with the group made it all the more fun! We mostly picked macoun and macintosh varieties which were perfect for baking. I found this Ooey Gooey Apple Crisp recipe by Yeah, That "Vegan" Shit and thought I would try it outI am really picky when it comes to apple crisp. My mother's recipe has been my favorite for years. She does not include oats or allspice. I decided to omit the same ingredients for this recipe and add cardamom (of course!). Everyone ate it up and I was left craving more. I decided to make another smaller version at home the next day (let the holiday gluttony begin) and it was just as delicious. A foolproof apple crisp, indeed!  I am shocked to say that it rivals my mother's recipe. This may also be the first time that I used up all of the apples picked in under a weeks time after going apple picking.  The cookie-like topping and caramel apple middle in this crisp are undeniably addictive!  

Waiting in line for apple cider doughnuts


Ingredients

5-6 apples, sliced in 1/4 inch slices
1 tablespoon cornstarch
2 teaspoons cinnamon
1 teaspoon cardamom
1/8 teaspoon nutmeg (I always use freshly ground)
1/2 cup brown sugar + 1/2 cup water

Topping:

1 cup flour
1/2 cup brown sugar
1/4 teaspoon baking powder
1/4 teaspoon cinnamon
1/6 cup canola oil
1.5 tablespoon soy milk
1/2 teaspoon vanilla
1/8 teaspoon salt


Directions:

Preheat oven to 375. Mix together cornstarch, cinnamon, cardamom, nutmeg, brown sugar and water. Place apples in a bread loaf pan and drizzle the mixture over the apples. Mix together all of the ingredients for the topping in a separate bowl. Apply to top of apple mixture. It will be moist. The original recipe calls for 1/2 Cup of flour, but I added another 1/2 Cup and it was still moist like a cookie dough. Cover with tin foil and bake for 10 minutes. Remove foil and bake for another 20-30 minutes. A nice dollop of your favorite ice cream would make this sinful. 


Enjoy!


Wednesday, October 5, 2011

Japanese Eggplant Casserole

This is another recipe made up with whatever ingredients happened to be in my fridge on a given day!  I love eggplant so I usually have some on hand. I happened to have some Japanese eggplant and I knew I wanted to grill it. I decided to marinated it overnight in a pre-made italian dressing. Japanese eggplant is sweeter and has a softer exterior than the western variety with a pretty light purple color. I think it may have a lower water content as well so it soaked up the flavors from dressing very nicely! I grilled it on the stove top after marinating and made a casserole with some fresh green beans, yukon gold potatoes, caramelized onions and chopped colorful tomatoes. Topped off with gruyere cheese and paprika, it was impossible for this casserole to not be delicious!  It was one of the tastiest dishes I have made! Marinating the eggplant overnight really helped with the extra flavor that might be missing from other eggplant dishes. A great dish for any occasion!


Ingredients

2 medium Japanese Eggplants
 Italian dressing
2 Yukon Gold Potatoes
1.5 pounds of fresh green beans
1 pint of small tomatoes, chopped
1 caramelized onion
1-2 Cups shredded Gruyere cheese
Paprika
Sat & Pepper to taste
Canola & olive oils


Instructions

Slice eggplant and marinate overnight. I used italian dressing, but you can experiment with different marinades. Use 1 tablespoon of canola to grill eggplant on medium heat until lightly brown on both sides (about 3 minutes per side). Set aside. 


Use 1-2 tablespoons of canola oil to grill the potato slices until brown on both sides. Cut ends off green beans and cut each in half. Sautee in 1/2 tablespoon of canola oil until tender. Set potatoes and green beans aside. 


Mix chopped tomatoes and caramelized onions together and spread the mixture evenly on the bottom of a casserole dish (I used a 13x9 dish). Add green beans, eggplant slices, potato slices, followed by cheese, a sprinkle of paprika and a little olive oil (~1/2 teaspoon). Bake at 350 degrees until cheese is golden brown and casserole is bubbly around the edges.


Enjoy!

Nomsense is on Facebook!