Tuesday, October 18, 2011

Candied Spaghetti Squash Custard Tart


Spaghetti squash is a fun, versatile vegetable. It's a great healthy substitute for pasta and can be eaten with tomato sauce or I really enjoy eating it straight up with a little cinnamon, cardamom, and a little nutmeg. It's packed with folic acid, potassium, Vitamin A, and beta carotene with only 42 calories per cup! I decided to fatten it up a bit by candying the already sweet squash and using it to make a dessert tart. I really had no idea how the end result would turn out, but I was hoping for what I ended up with. The custard and candy sweet squash blended really well together. I made this with a friend and brought it to a party. I found it amusing that people who have never had spaghetti squash thought I had used spaghetti pasta and sweet cheese! So, I am pleased to introduce this phenomenal food to those who may have never tried it before.


Ingredients

1 Spaghetti squash
Nutmeg
Cinnamon
Cardamom
Canola oil

Baked Custard
(Betty Crocker original)
3 Eggs
1 cup evaporated milk
11/2 cups soy milk
1 teaspoon vanilla
dash of salt

Crust
Note: I modified my recipe and added 1 tablespoon of corn flour and 2 tablespoons of shortening after making this crust.

Directions
Preheat oven to 350F. Cut Squash in half, lengthwise. It helps to have a good knife and strong muscles to do this. I had a knife and my friend had the muscles! Brush with canola oil. Season with cinnamon, nutmeg and cardamom. Bake until you can easily separate spaghetti-like striations off the squash with fork (~30 min.).

Prepare dough for the pie crust while the squash is cooking. After chilling the dough, roll out and place in tart pan. Poke the dough with a fork and place in freezer for at least 15min. or until squash is done. Remove squash from oven and remove its fabulous spaghetti insides. Bake pie crust until you just start to see it turning golden brown. 


spaghetti!
It really is squash!
Candying The Squash
I am fairly inexperienced with candying. In fact, this was the first time I have ever done this! You may have a little better luck with achieving a more candy-like consistency. The squash was definitely sweeter with a pretty amber color. 

Add equal parts sugar and water in a medium saucepan. Add half of the spaghetti squash and bring to a boil. Next, add 1/2 teaspoon powdered ginger. This added a really nice flavor to the tart! I use Penzeys. We tried to achieve a soft ball candy, but when the temp reached 212F and sat there for a bit, we  turned off the heat. The spaghetti squash looked like glass noodles:


Add the non-candied spaghetti squash to the bottom of the pie crust followed by the custard mixture. 


Custard
Beat eggs, sugar, vanilla and salt in medium bowl. Heat milk (I used a combination of evaporated and soy milk since that is what I had on hand. It tasted great!) and beat with egg mixture. 


Once the custard mixture has been added, fork the candied squash randomly on top. Allow some of the sugary syrup to drop in.  The sugar will caramelize along the edges of the crust while baking, adding extra sweetness! Bake until knife inserted in the middle of the tart comes out clean.

candied squash pinwheels! 
 I decided to make some candied squash pinwheels with the left over dough.  I added some Chipotle Taza chocolate I had left from the Taza factory tour a few weeks ago. The combination was delicious! A nice sugary coating cooked on the bottom of the pinwheels and they were a nice treat to eat while waiting for the tart to cook! My apartment was smelling pretty heavenly!


Enjoy!

Friday, October 14, 2011

Apple Crisp


Apple picking season has quickly arrived. I really enjoy introducing people to this annual activity. A favorite local spot is Honey Pot Orchards in Stowe, MA. People will wait in line for up to one hour to eat the freshly made apple cider doughnuts! I remember one year when I brought a friend who had never been. After 30 minutes of waiting in line he grew increasingly impatient. We almost knew everyone around us as you have no choice but to share in each other's pain waiting in line while smelling the waft of delicious doughnuts being made. It can be agonizing. My friend waited it out and after one bite of a warm cider doughnut, the look of satisfaction was priceless.  This year I went with a few friends who are apple picking veterans. Cooking immediately afterwards with the group made it all the more fun! We mostly picked macoun and macintosh varieties which were perfect for baking. I found this Ooey Gooey Apple Crisp recipe by Yeah, That "Vegan" Shit and thought I would try it out. I am really picky when it comes to apple crisp. My mother's recipe has been my favorite for years. She does not include oats or allspice. I decided to omit the same ingredients for this recipe and add cardamom (of course!). Everyone ate it up and I was left craving more. I decided to make another smaller version at home the next day (let the holiday gluttony begin) and it was just as delicious. A foolproof apple crisp, indeed!  I am shocked to say that it rivals my mother's recipe. This may also be the first time that I used up all of the apples picked in under a weeks time after going apple picking.  The cookie-like topping and caramel apple middle in this crisp are undeniably addictive!  

Waiting in line for apple cider doughnuts


Ingredients

5-6 apples, sliced in 1/4 inch slices
1 tablespoon cornstarch
2 teaspoons cinnamon
1 teaspoon cardamom
1/8 teaspoon nutmeg (I always use freshly ground)
1/2 cup brown sugar + 1/2 cup water

Topping:

1 cup flour
1/2 cup brown sugar
1/4 teaspoon baking powder
1/4 teaspoon cinnamon
1/6 cup canola oil
1.5 tablespoon soy milk
1/2 teaspoon vanilla
1/8 teaspoon salt


Directions:

Preheat oven to 375. Mix together cornstarch, cinnamon, cardamom, nutmeg, brown sugar and water. Place apples in a bread loaf pan and drizzle the mixture over the apples. Mix together all of the ingredients for the topping in a separate bowl. Apply to top of apple mixture. It will be moist. The original recipe calls for 1/2 Cup of flour, but I added another 1/2 Cup and it was still moist like a cookie dough. Cover with tin foil and bake for 10 minutes. Remove foil and bake for another 20-30 minutes. A nice dollop of your favorite ice cream would make this sinful. 


Enjoy!


Wednesday, October 5, 2011

Japanese Eggplant Casserole

This is another recipe made up with whatever ingredients happened to be in my fridge on a given day!  I love eggplant so I usually have some on hand. I happened to have some Japanese eggplant and I knew I wanted to grill it. I decided to marinated it overnight in a pre-made italian dressing. Japanese eggplant is sweeter and has a softer exterior than the western variety with a pretty light purple color. I think it may have a lower water content as well so it soaked up the flavors from dressing very nicely! I grilled it on the stove top after marinating and made a casserole with some fresh green beans, yukon gold potatoes, caramelized onions and chopped colorful tomatoes. Topped off with gruyere cheese and paprika, it was impossible for this casserole to not be delicious!  It was one of the tastiest dishes I have made! Marinating the eggplant overnight really helped with the extra flavor that might be missing from other eggplant dishes. A great dish for any occasion!


Ingredients

2 medium Japanese Eggplants
 Italian dressing
2 Yukon Gold Potatoes
1.5 pounds of fresh green beans
1 pint of small tomatoes, chopped
1 caramelized onion
1-2 Cups shredded Gruyere cheese
Paprika
Sat & Pepper to taste
Canola & olive oils


Instructions

Slice eggplant and marinate overnight. I used italian dressing, but you can experiment with different marinades. Use 1 tablespoon of canola to grill eggplant on medium heat until lightly brown on both sides (about 3 minutes per side). Set aside. 


Use 1-2 tablespoons of canola oil to grill the potato slices until brown on both sides. Cut ends off green beans and cut each in half. Sautee in 1/2 tablespoon of canola oil until tender. Set potatoes and green beans aside. 


Mix chopped tomatoes and caramelized onions together and spread the mixture evenly on the bottom of a casserole dish (I used a 13x9 dish). Add green beans, eggplant slices, potato slices, followed by cheese, a sprinkle of paprika and a little olive oil (~1/2 teaspoon). Bake at 350 degrees until cheese is golden brown and casserole is bubbly around the edges.


Enjoy!

Thursday, September 29, 2011

Grilled Barbecue Chicken Pizza


Fall is my favorite time of the year. The temps are ideal for outdoor dining before the winter chill arrives. I recently enjoyed hosting a barbecue pizza party with some family. There was lots of light hearted banter while chopping, cheese shredding, and trying to prevent the chicken from being eaten before it was time to start making the pizzas! Everyone had fun creating their own individual pizzas. Pizza dough always tastes great on the barbecue if you use a liberal amount of olive oil to prevent the dough from sticking to the grill. The barbecued chicken was cooked to perfection. It really was difficult not to eat it all while cutting it during the preparation! The key is to only flip the chicken once while grilling. I combined mozzarella and gouda with the barbecue sauce as an added topping with the tomato sauce. All ingredients blended well together with plenty of options for the vegetarians in the group. 

Ingredients:
Yield: ~10 
1 Red Onion Sliced
2 Red Bell Peppers Sliced
Prepared pizza dough (2)
Crushed tomato seasoned with basil, salt, pepper and garlic salt (or your favorite sauce)
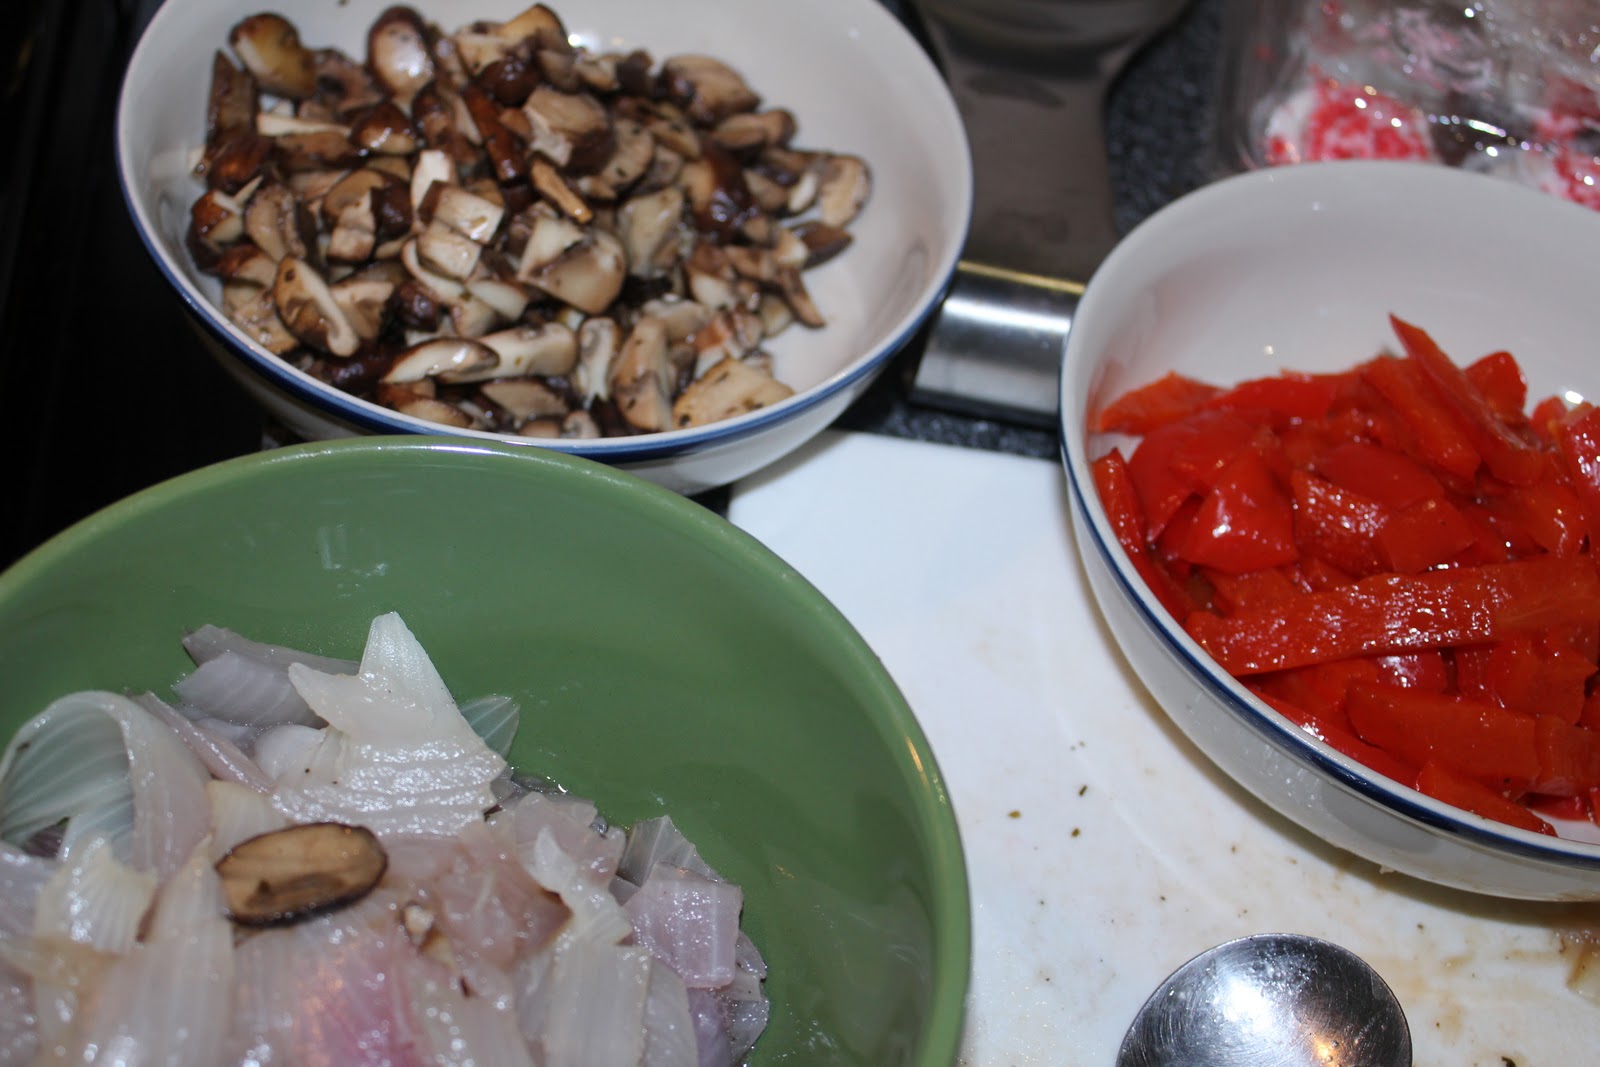
Sauteed mushrooms
BBQ sauce
Shredded Mozzarella cheese
Gouda
Olive oil
4 Chicken Thighs


Season chicken thighs with salt and pepper on both sides. BBQ each side ~15min per side until meat is not pink in the middle. Apply BBQ sauce last 10minutes of cooking. Set aside. Wrap onion and red pepper separately in foil and cook on a lower temp until soft.


Cut the pizza dough into 5-6 pieces, stretch each piece while coated with olive oil. Layer dough between parchmont paper. 

Meat and meatless sauce


Brush BBQ with olive oil. Place dough on BBQ. Remove dough when brown on bottom and place on plate, cooked side up. Apply toppings and place pizza back on the BBQ, uncooked side down. Pizza is done when bottom is brown.

BBQ sauce added a nice flavor with the tomato sauce
The barbecue was full of pizza!

Perfect bites
niece approved!


The options are endless with pizza. Now, especially with cheese substitutes, whole wheat dough, gluten free, etc.. everyone can enjoy a good pizza!  I have also made dessert pizzas with peaches, blueberries, cinnamon, sugar and a little butter. It is best to have the peaches cooked on the grill ahead of time. The results are worth the preparation time!
Have fun hosting your next pizza party!! 

Monday, August 15, 2011

Chocolate Covered Macaroons and Taza Chocolate Tour

Leave it to Alton Brown to come up with the quintessential macaroon recipe! These macaroons were dipped in a cinnamon chocolate from Taza where I recently went on a factory tour with some fellow food bloggers (see details at end of post). The result is a cookie truly meant for anyone who loves coconut & chocolate!  I am now a devout fan of Taza chocolate and will be heading back to the factory store to purchase more items for future recipes such as cacoa nibs, chocolate extract and other chocolate treats!


Ingredients

4 Egg Whites
1/2 Cup granulated Sugar
1 pinch salt
8oz. shredded coconut, toasted
2 bars of cinnamon Taza chocolate


The round Taza chocolate bar!


Melt chocolate in double boiler under medium heat

Directions

Preheat oven 350F
Whisk egg whites until glossy. Add in sugar in three parts. Add one part and mix, two and three. Fold in toasted coconut. Fill pastry bag fit with no. 96 tip with cookie mixture. Pipe cookies about 1-2 inches apart on parchment paper or silpat on a cookie sheet.


Bake until golden brown, about 15min. Cool.


Melt chocolate in double boiler and dip cookies in chocolate. freeze for about 5min until set. Store in refrigerator until ready to eat.


Touring through the Taza chocolate factory located in Somerville, MA. with the Boston Food Bloggers  (organized by fellow bandmate and creator of Fork It over, Boston, Rachel Leah Blumenthal) was educational and fun! Sporting some fancy hairnets, we learned a great deal about this small bean-to-bar chocolate company. For one, Taza supports the well-being of the Cacao growers and has established a reputation for having a positive impact on local and distant communities. The Cacao beans are purchased directly from growers in the Dominican Republic and Bolivia. Using their own machinery including a winnower purchased from an old candy maker in Italy and a roaster found in an old factory in Germany, Taza is a very hands on company where the chocolate bars are still wrapped by hand in biodegradable, minimal packaging! The stone grinding process is the most crucial step in making the chocolate. Alex Whitmore, one of the founders of the company, studied under a stone miller in Mexico to bring the art to Taza in creating the chocolate. The resulting granular texture and fruity natural flavor is unlike anything I have ever eaten.  I was really impressed with the company and I was fortunate enough to sample many of the various flavors of the chocolate they produce. Some include salted almond (a crowd favorite), cinnamon, ginger, chipotle and sat and pepper to name a few. Stop by the Taza factory and store located in Somerville, MA. They are especially welcoming to bikers as they frequently deliver chocolate to many of the local farmers markets via bike courier! 


Cacao Beans from the Dominican Republic
Dried Cacao Pod 

Winnower machine from Italian candy factory
Molinos from Oaxaca, Mexico used for grinding the chocolate


Thursday, August 11, 2011

Mango Cake with Vanilla Frosting and Toasted Coconut


There is an unintentional theme of recipes consisting of foods that are orange or that go with orange here on the Nomsense food blog! Today it is the glorious mango in cake form. I've been to tropical places like Jamaica, Tobago and the Bahamas where mangoes are plucked and eaten right off the tree. I am reminded of the happy people I met living mostly off the food they grow and catch from the sea.

Tobago

Since Mangoes and cake are two of my favorite things, it only made sense to turn a few very ripe mangoes in my fridge into a cake for a family gathering. I found the cake recipe on Food.com. It was a hit and a perfect summertime dessert. The mango provides for an extra moist consistency and the frosting adds a nice creamy vanilla sweetness. The shredded coconut is an added treat which I decided to add due to the extra surplus I ordered by mistake a few months back! It goes nicely with the mango. This is a very easy and quick cake to make for any occasion. You can always substitute for vegan friendly ingredients or other sweetener options instead of sugar. It tastes great alone without the frosting or try it with just the toasted coconut, whipped topping, or with a nice cream cheese frosting as recommended in the original recipe.


Ingredients

Cake
4 very ripe mangoes to make 2 1/2 Cups of puree
2 Cups of sugar
2 Eggs
1 Teaspoons vanilla
2 Teaspoons baking soda
2 Cups Flour

Mango Puree


Vegan Vanilla Frosting
4 Cups Confectionary Sugar
2 Teaspoons Vanilla
1 Cup vegan margarine (I used Earth Balance)
3 Tablespoons vegan milk
2 Cups toasted coconut


Directions

Cake
Preheat oven to 350F. Grease and flour a 13x9 cake pan or any size/shape of your choice. Mix together mango puree, sugar, eggs and vanilla in a large bowl until well combined. Next, add in flour and baking soda. Pour mixture into cake pan and bake for 35-40 minutes or until knife or toothpick comes out clean from center of cake. Cool completely before frosting.

Frosting
Note: I only had soy milk and Smart Balance on hand, so I made a vegan frosting. You can use any type of milk and margarine substitute. Earth Balance worked very well! Cream margarine, vanilla and sugar together. Add in milk until frosting reaches desired consistency. Store in refrigerator until used. If cold, bring to room temperature by mixing well. Apply a big dollop of frosting in the middle of the cake and spread out to the edges from the middle. This will help prevent crumbing. Sprinkle on the toasted coconut.


This recipe would make fabulous cupcakes or a very nice layer cake. I might try adding pineapple, shredded carrots and/or some orange zest next time around. Cinnamon would go perfectly as well. This is a recipe with many possibilities.


Enjoy!

Nomsense is on Facebook!